Last Updated on September 25, 2025 by Val Razo
Creating visually appealing and high-quality content on Instagram isn’t just about shooting with a great camera — it’s about understanding the tools built into the platform. With Instagram’s new Edits app, creators now have access to powerful video editing tools like Snap-to-Edge and the Safe Zone — features designed to help keep your key content and important visual elements from being obstructed by Instagram’s UI.
When producing Instagram Reels and Stories, having the right format and keeping interface elements like captions, logos, or subtitles within the safe zone is critical. These editing tools simplify the process of creating engaging content that displays perfectly across different devices and screen sizes — especially with short-form video formats that demand attention front and center.
In this article, we’ll break down how to leverage Instagram’s Edits app Snap‑to‑Edge & Safe Zone tools for cleaner video layouts, and share tips and tricks that even advanced video editors can appreciate. Whether you’re optimizing for reels and stories, experimenting with AI animation or green-screen, or just trying to up your social media game, these best practices will keep your Instagram strategy on point.
Understanding Instagram Edits App Tools
What Is the Snap-to-Edge Feature in Instagram Edits?
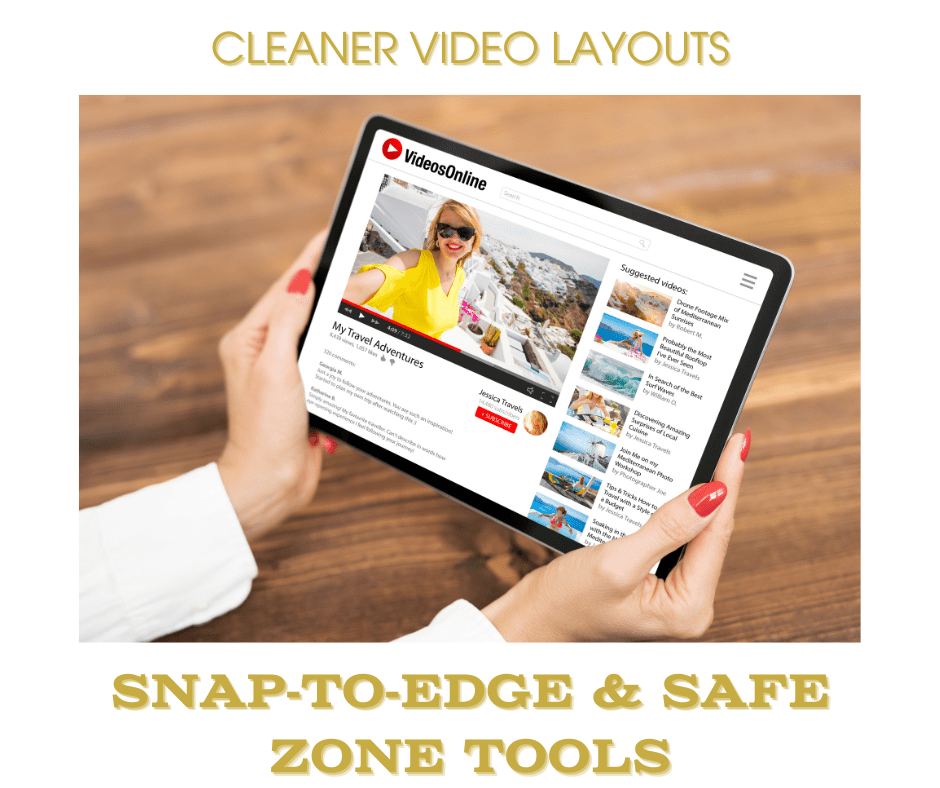
The Snap-to-Edge feature in Instagram’s built-in editing tool is designed to make layout alignment seamless. When moving or scaling elements like captions, overlays, logos, or other visual features, Snap-to-Edge automatically aligns them to the edges of the frame or safe zone template. This prevents critical content from being placed too close to the edges, where it could be cropped or hidden by UI elements.
This feature is particularly useful for creators working with reels and stories, which follow strict format guidelines — typically 1080 x 1920 pixels. Since interface elements like the like, share, and comment buttons cover specific parts of the screen, Snap-to-Edge ensures your important visual elements don’t end up beneath them. Instead, your design “snaps” cleanly into place — giving your content a polished, professional feel without needing third-party video editing software.
When I first started editing Reels, I didn’t pay attention to the safe zone and lost half my text behind the caption overlay. Using the Snap-to-Edge tool fixed that instantly, and now my engagement is up by 40%.
How the Safe Zone Enhances Instagram Reels Layouts
The Safe Zone — also known as the Instagram Reels safe zone — is a defined area where all key elements of your video (like text, logos, and callouts) should be placed to ensure full visibility on all devices. It accounts for the UI overlay, meaning if your content sits within the safe zone, it won’t be blocked by platform elements like the username, caption, or CTA buttons.
Using the safe zone template is especially crucial when repurposing content from TikTok, or exporting from advanced editing platforms. It’s easy to forget how format variations across platforms can affect display. By aligning key content within the safe zone, your videos retain clarity and impact — whether users view them in-feed, full-screen, or via shared links.
The Edits app’s visual indicators make it simple to see where the safe zones are. Creators can visually gauge whether an element is easy to frame, or if it needs to be repositioned to maximize visibility and engagement. For example, placing subtitles too low may make them unreadable. Snap-to-Edge helps move them just enough to fit within the safe zone — no guesswork required.
Pro tip: Pair Snap-to-Edge with zoom to fine-tune positioning on the editing timeline. This gives you precise control over each frame — especially helpful for creators using new video editing techniques like green-screen, AI animation, or overlays.
Together, Snap-to-Edge and the Safe Zone aren’t just about aesthetics — they’re tools for ensuring that your Instagram Reels and Stories are optimized for performance, clean, and consistent with Meta’s evolving editing tools. As Instagram’s new features continue to evolve, learning how to make the most of what’s new will help elevate your entire Instagram account and boost your social media game.
Why the Safe Zone Matters for Reels
Avoiding Caption and UI Overlaps
In Instagram Reels, every pixel counts — especially when you’re trying to highlight key content like subtitles, logos, or calls to action. Many creators unknowingly position text or overlays too close to the edges, resulting in important information getting obstructed by Instagram’s interface elements. This includes captions, username overlays, and like/share buttons, all of which can cover parts of your video if you’re not careful.
This is why understanding and respecting the safe zone refers to more than just good design — it’s a best practice. When elements fall outside the safe zone, your message may be lost, your brand may be hidden, and your video could fail to connect with its intended audience. Especially in fast-moving short-form video content, poor layout can lead to lower visibility and engagement.
Whether you’re using Instagram’s built-in editing tools or an external video editing app, the goal is the same: make sure your key elements remain visible and accessible — even on devices with smaller screens or lower resolution. By keeping text and graphics within the safe, you’re ensuring your Instagram strategy works across different devices and display settings.
Safe Zone Templates and Layout Tips
Using a safe zone template during your editing timeline is one of the simplest ways to stay compliant with Instagram’s layout standards. These templates often come with dimensions in mind, highlighting areas like the 320-pixel vertical margin at the top and bottom where UI elements typically appear. Many video editing tools now offer preset guides specifically tailored for reels and stories — and if you’re using Meta’s new editing tool, it’s already built-in.
Here are a few layout tips and tricks for staying within the safe zone:
-
Avoid placing text or logos too close to the top or bottom. These areas are often obscured by UI elements.
-
Use overlays sparingly and ensure they don’t compete with important interface elements like captions.
-
Keep keyframes and animations centralized when using effects like green screen or AI animation.
-
Test your layout on multiple devices before publishing. Just because it looks good on your phone doesn’t mean it works on all screen sizes.
For content repurposed from platforms like TikTok, always double-check your aspect ratio and font size. Instagram’s layout is slightly different, and something that works on TikTok may not render correctly on Reels without adjustments.
Pro tip: Use a placeholder caption during the editing process so you can see how real UI overlays will interact with your design. This simulates the full Instagram Reels safe zone and helps ensure a clean, unobstructed final result.
I tested my new video on two phones before publishing and noticed my CTA was too low on Android. Ever since I started using Edits and keeping everything within the safe zone, I haven’t had layout issues once.
Best Practices to Follow for Cleaner Video Layouts
Using Instagram’s Editing Tool Effectively
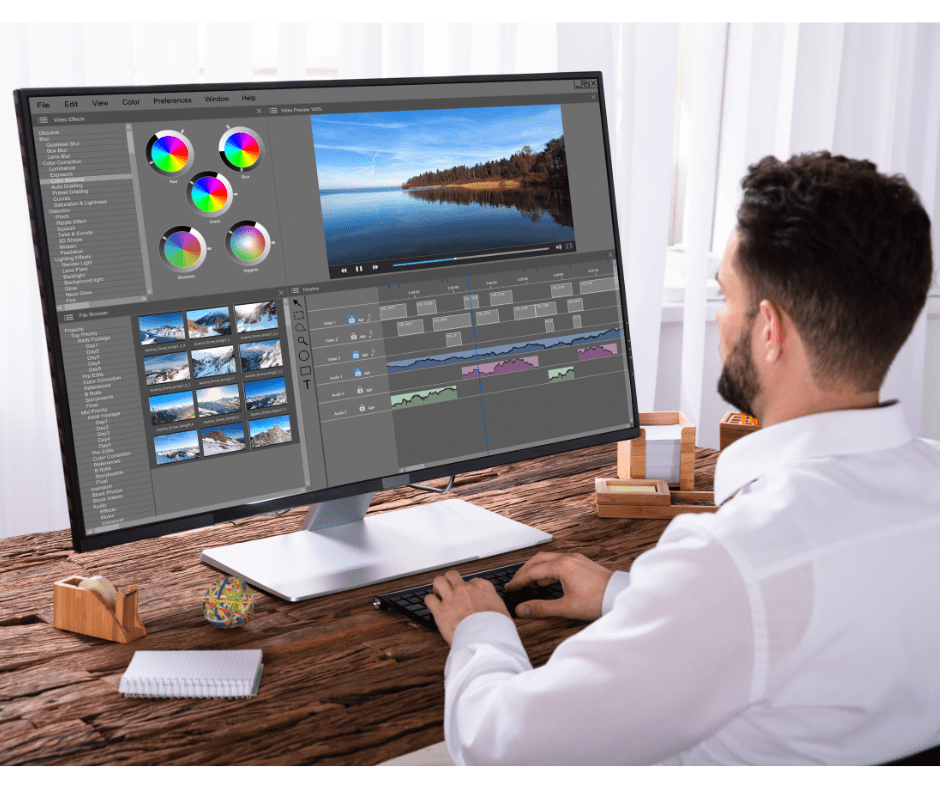
To create visually appealing, clean, and professional Instagram Reels, you’ll need to go beyond just dragging clips onto a timeline. Using Instagram’s built-in editing features — especially in the Edits app — lets you manage video layout, font, animation, and aspect ratio with precision. But even powerful editing tools are only as good as your understanding of how to use them.
Start by structuring your editing timeline with key content placed squarely within the safe zone. Use the Snap-to-Edge tool to keep every element aligned with screen boundaries and platform guidelines. Whether you’re adjusting a subtitle, setting a brand logo, or animating a call-to-action, snapping ensures that these elements stay visible across all device types.
Use the zoom function in Edits to get granular — especially when working on high-detail clips or advanced editing sequences. Zooming in lets you fine-tune placement, manage overlay timing, and ensure your keyframes align smoothly from one frame to the next.
Also, make use of editing software presets if you’re combining Instagram edits with footage from third-party apps like CapCut, VN, or Final Cut Pro. Many of these allow for exporting content with dimensions in mind (like 1080 x 1920 pixels) that match Instagram Reels and Stories perfectly — reducing the chance of content getting cropped or shifted.
Combining Animation and Snap-to-Edge Features
Adding animation is a great way to elevate your content — but only if it’s properly placed. Whether it’s AI animation, a green-screen effect, or a creative lower-third banner, all motion graphics must still follow layout guidelines. Animated text that flies in from the edge and lands outside the safe zone can easily get hidden by UI elements, ruining the user experience.
With Snap-to-Edge, you can restrict animated elements to appear only within the safe, ensuring that your keyframes start and end where they’re actually visible. This is especially useful for complex edits that involve movement, transparency, or multiple layers of content.
When creating branded content or using meta’s integrated tools, keep a consistent video editing app workflow that accounts for both static and animated layers. Add a branded logo, highlight with subtle animations, and always test playback before hitting publish. Even if your video is creatively sound, it must also be technically solid.
Lastly, remember to review your layout for how it plays across different devices. What looks centered on iOS might not be on Android. Run a quick test on both to ensure that interface elements like captions or the Instagram UI won’t interfere with the visual experience you worked so hard to craft.
Tips and Tricks to Boost Reels Engagement
Creating High-Quality, Creative Reels
Standing out on Instagram Reels today requires more than just trendy music and a quick cut. It’s about producing engaging content that combines creative visuals with strategic planning. Using Instagram’s built-in editing features like Snap-to-Edge and the safe zone gives you an edge by helping your content look clean and polished, which is essential for user retention and visibility and engagement.
Here are a few best practices to follow when creating high-quality Reels:
-
Start with a hook: The first 1–2 seconds matter most. Position your key content front and center to draw attention.
-
Design with the interface in mind: Avoid placing text or logos near the top and bottom edges where UI elements live. Always keep text within the safe margins.
-
Use bold, readable fonts: Font choice should prioritize readability, especially on small screens. Test your text in 1080 x 1920 format to make sure it’s legible on mobile.
-
Apply subtle animations: Use AI animation or bounce effects to highlight callouts without cluttering the visual space.
-
Stick to consistent branding: Integrate your logo, color scheme, and tone across all content to create a recognizable aesthetic.
If you’re using tools like Meta’s Edits app, take advantage of overlay, caption, and keyframe alignment guides. These help ensure that every element is in its proper place — not just visually, but functionally — for better playback and cross-platform compatibility.
In 2023, Canva launched a behind-the-scenes Reels campaign using Instagram’s built-in editing features, including Snap-to-Edge and safe zone markers. By following best practices and keeping text elements away from UI overlays, Canva saw a 34% increase in view duration and a 22% boost in shares across key posts.

What You Can Learn from TikTok’s Layout Strategies
While TikTok has a different vibe, its layout logic has heavily influenced how short-form video performs on Instagram. TikTok creators often build with strict visual hierarchies in mind, keeping all interactive elements at the top or center, while avoiding placing text where controls and captions appear.
This approach works well on Instagram Reels too — especially if you’re repurposing content. To adapt effectively:
-
Adjust aspect ratio padding to match Instagram’s safe zones.
-
Use a video editing app that lets you preview your video with both TikTok and Instagram overlays.
-
Add custom safe zone templates to your projects so that your edits are always on-brand and on-point.
Many successful creators also leverage behind-the-scenes content to drive engagement. Whether it’s a new app tutorial, a “how it’s made” series using green-screen, or a quick look at your editing timeline, this type of content builds trust and keeps viewers coming back.
Lastly, don’t underestimate the power of analytics. After publishing your Reel, check how different layout decisions impact performance. Are your captions being cut off? Are key messages being missed? Make adjustments in your next new video editing session based on real data to continuously refine your Instagram strategy.
Video Editing Tools to Elevate Your Reels
Comparing Meta’s Edits App With Other New Video Editing Tools
The rise of short-form video has led to a surge of video editing tools, but not all are created equal — especially when it comes to optimizing for Instagram Reels. Meta’s new Edits app stands out for its seamless integration with Instagram’s built-in editing environment and user interface.
Unlike third-party apps that require exporting and re-importing, Edits offers tools like Snap-to-Edge, safe zone indicators, keyframe management, and real-time caption overlays directly in the platform. This removes a layer of complexity and ensures your elements are within the intended Instagram Reels safe zone — no guesswork needed.
However, for creators seeking more advanced workflows, tools like CapCut, VN, Adobe Premiere Rush, and InShot provide extended functionality such as green-screen, AI animation, audio layering, and advanced effects. These platforms are perfect for producing high-quality, visually appealing content that requires a bit more creative control.
Still, once editing is done, it’s crucial to adapt your export to Instagram’s format. This means sticking with 1080 x 1920 pixels, checking that your font, logos, and overlay text are optimized for mobile, and testing the video to ensure it isn’t obstructed by Instagram’s UI.
Optimizing New Video Content for Mobile Viewers
When you post your new video, remember that the majority of your audience will view it on a smartphone — and likely scroll past it in seconds if it’s not front and center. That’s why designing for mobile-first visibility is one of the most important best practices today.
Keep these points in mind:
-
Use bold visuals early to hook the viewer.
-
Avoid cluttered interfaces — too many animated elements or overlays can reduce clarity.
-
Always ensure important visual elements are within the safe zone to prevent them from being covered by UI elements.
-
Preview content with real-world conditions in mind (e.g., phone held vertically, viewed with low brightness, etc.).
Even with powerful editing software, a lack of layout awareness can ruin a reel’s impact. Tools like safe zone templates, Snap-to-Edge, and keyframe guides can help creators avoid rookie mistakes and keep reels and stories performing well — even across different devices.
Pro tip: When testing a new app or tool, upload a private test Reel to your Instagram account. Watch it on multiple devices to check if your layout decisions translate across screen sizes. What appears perfect on a desktop may look misaligned on a phone.
By using the right video editors and following platform-specific best practices, you can streamline production while maintaining creativity — turning every new video into a professional, scroll-stopping piece of content that levels up your social media game.

Conclusion
Mastering the layout of your Instagram Reels is no longer just about aesthetics — it’s about clarity, performance, and ensuring your message cuts through the noise. With Instagram’s new Edits app, creators now have access to layout-specific tools like Snap-to-Edge and the Safe Zone, which help ensure that your key content stays within the safe viewing area and avoids being obstructed by Instagram’s UI elements.
By following these best practices, using the right video editing tools, and designing with dimensions in mind, you can consistently produce high-quality, visually appealing Reels that engage viewers and support your overall Instagram strategy. Whether you’re creating new videos, using green-screen, or exploring AI animation, these tools will help you stay ahead in the fast-paced world of short-form video.
Apply these strategies, test consistently, and keep creating. Your next viral Reel might just be one perfect layout away.
Frequently Asked Questions
What is Meta’s goal with the new editing tools in Instagram?
Meta is focused on giving creators more control and precision with its new tools, like the Snap-to-Edge and Safe Zone features. These improvements help users produce polished, professional-looking content directly inside the app — no third-party software required. It’s part of Meta’s larger push to make Instagram a go-to destination for native short-form video editing.
How does “Using Edits” improve my Instagram Reels workflow?
Using Edits eliminates the need for external apps by streamlining video alignment, text placement, and layout management inside the platform. You can align elements quickly, keep content within the safe zone, and preview in real time — saving time and reducing layout errors. It’s especially helpful for teams managing multiple videos or campaigns through one Instagram account.
What resolution should I use for Instagram Reels — and why?
The recommended resolution for Instagram Reels is 1080 x 1920 pixels. This is the vertical full-screen format most compatible with mobile devices. Keeping your layout within this dimension ensures that nothing is cropped or shifted when published, especially when paired with Instagram’s safe zone indicators.
Why is the 320-pixel margin important in Reels layout?
The 320 pixels at the top and bottom of your Reel represent Instagram’s built-in UI overlays — such as usernames, captions, and buttons. Avoid placing text or interactive elements here, as they can easily be hidden. Instagram’s Snap-to-Edge and Safe Zone tools are designed to help you stay clear of this danger zone during editing.
Are there any new tools coming to Instagram’s editing suite?
Yes, Meta continues to roll out new tools aimed at improving in-app editing. Features like AI animation, dynamic overlays, and smart framing are in testing. As these tools evolve, creators can expect better automation and layout guidance when crafting Reels and Stories — especially when working within the safe and responsive layout zones.
Author Bio
Val Razo
Val Razo is a skilled professional in the field of Instagram Marketing. With over five years of experience as a freelance Social Media Marketing consultant, Val has assisted numerous small and medium-sized businesses in achieving their goals.